|
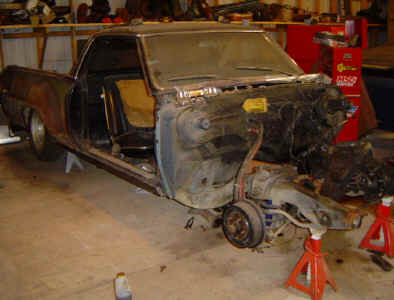
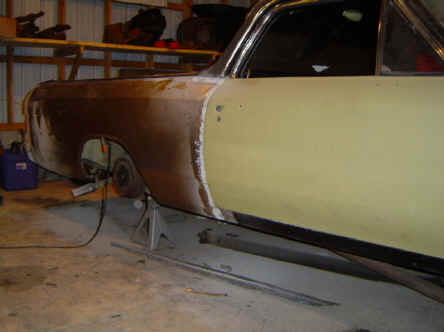
A couple of months have passed
since he last time you've seen the CJY 67 Elcamino. The
Last time you saw it, we slammed it and spent some money
are parts. Since then, CJY staffer Tommy Zerbe has been
hard at work disassembling the old girl and cutting off
the putty riddled old panels.
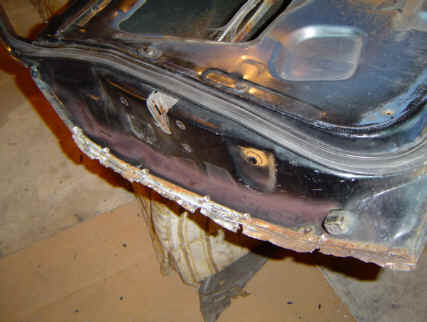
The lower patch panel for the
right front fender which we got from www.restoreclassics.com
fit well. This was a lot cheaper that buying a
reproduction front fender and I know the fender fits
because it's the fender from my car. All the other panels
we got fit well also.
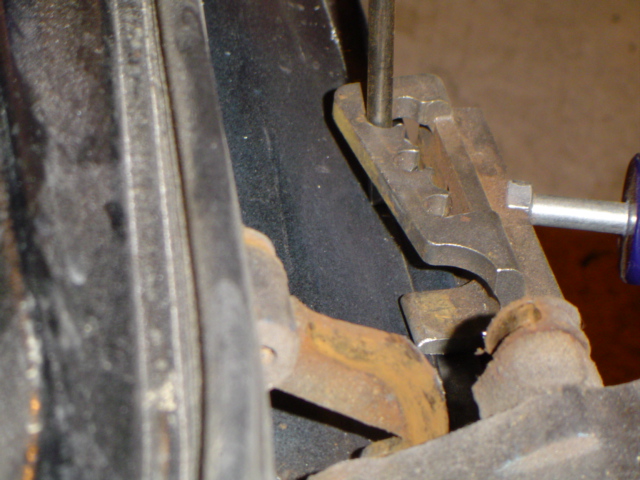
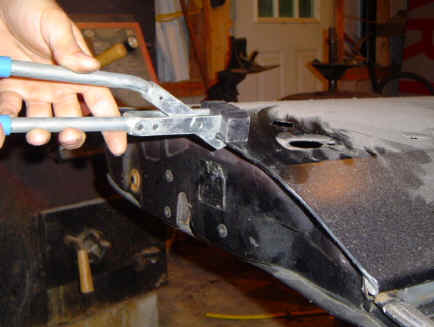
While preparing to install the
new door skin & tailgate skin, we discovered some
tools from www.eastwood.com
that would make the job a lot easier. First we used the
"Eastwood Pro Spot Weld Cutters" which is I'd
describe as special drill bit for drilling out spot welds.
Tommy felt this tool did a clean job and made quick work
of the factory spot welds.

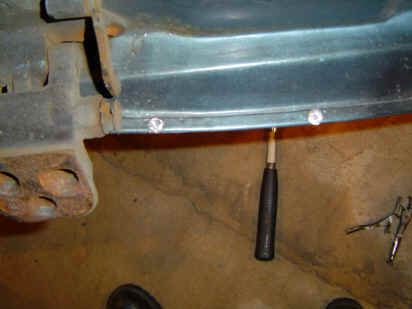
After drilling the spot-welds
out, Tommy needed to pry the old panel off the door. We
found another handy tool from Eastwood,
their "Door Skin Remover". One part of this tool
slid along the edge of the door and acted as something to
pry against while the other part of the tool was like a
screwdriver with a hook on the end. Tommy used the tool by
sliding the hook under the lip of old panel and pried
against the other part of the tool.
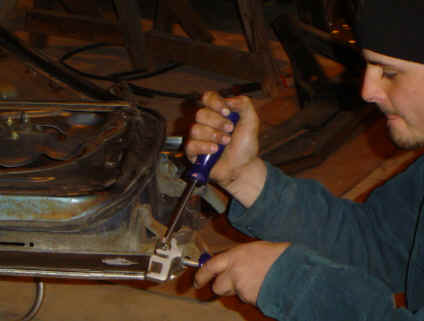
The drilled out spot-welds
broke feel easily. We also used the tool for removing our
old tailgate skin.
After the old door skin was
removed, it was time to put the new one on. At first it
didn't seem to fit but after some "finagling",
we got it on and it actually fit very well. Using yet
another tool from Eastwood,
the "Door Skin Installer" which simply crimped
the panel around the door, the new door skin was installed
and the door was ready to go back on the Elcamino.
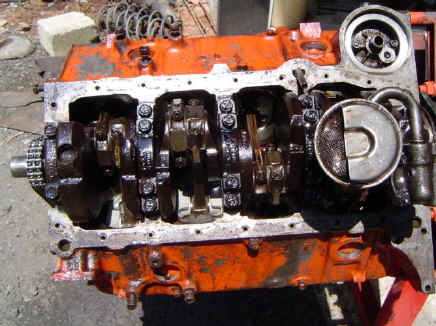
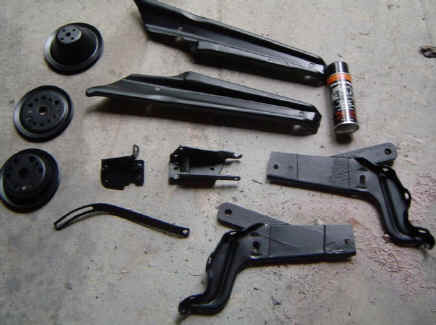
While Tommy was doing all the
body panel repairs & replacement, I pulled the motor
& trans out for detailing. I was pleasantly surprised
to find an 11" #621 bell housing between the 1978
dated 350 truck motor and the M21 Muncie 4 speed. The
heads were 78 truck 1.94/1.5. I also discovered it was 4
bolt main with "X" rods. Eureka.
Everything looked fine
internally, but I wanted to do something to boost
performance and the Elcamino's image without spending tons
of money. A cam swap was just the ticket. Since my 350 did
have an old Edelbrock Torker II intake, I went to Summit
Racing and chose an Edelbrock Torker II Cam package to
match my intake. The cam in this package has a 292/300
duration at .006" lift, .488" lift and a 108
lobe separation. This should give the old girl some
rumpity rump. I also installed a new double roller timing
chain, Holley fuel pump and used Comp Cams roller tip
rockers, all of which I found at a local swap meet. See,
I'm cheap, just like you.
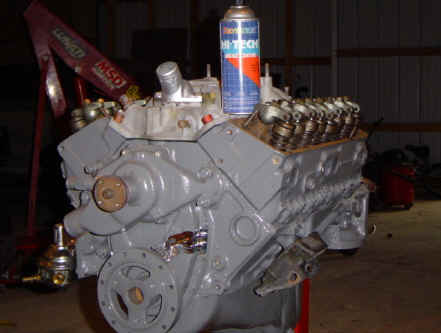
Because I originally pulled
the motor out for detailing purposes, I needed to get
cleaning & painting. I don't know about you but I
never seem to get the motor clean enough. When I buy
engine paint at my local auto parts store, it always takes
more than one can and the paint job always turns out
crappy because some dirt or oil bleeds through the new
paint in the form of fish eyes. This time, I decided to
try paint from somewhere else. I checked the www.eastwood.com
site and found their "Fast Dry Engine Paints".
Since everyone and their uncle paints a small block Chevy
orange, I though I'd be different. Eastwood
had plenty of colors to choose from. I know you going to
puke when you hear what I chose. I chose Ford Gray to work
with the silver paint I chose for the car. Getting my
paint from Eastwood
paid off. I had it in 2 days and the paint job came out
perfect. No fish eyes and one can did the entire motor and
the bell housing.
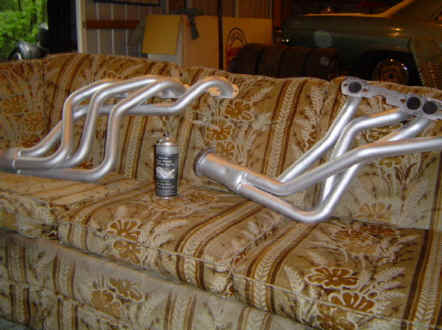
Now that I got a nice, pretty
motor, I could hardly bolt those old pulleys and rusted
headers back up so I ran everything through my sand blast
cabinet. Since the engine paint from Eastwood
worked so well, I got some of their "Under Hood
Black" semi gloss spray paint and Eastwood's
"Silver High Temp Coating" for my headers. The
"Under Hood Black" smelled a little funny but
put a tough finish on my parts in one coat and the parts
looked factory new again.
The "Silver High Temp Coating" was just that,
a coating. You could tell as you strayed it. It laid on
thick in one coat. One can could probably do 10 sets of
headers.
Till I got the engine stuff
done, Tommy had one new Qt. Panel on. The Elcamino is now
starting to go back together. Insert
Now I got to get the engine
bay cleaned & painted, the engine & trans
re-installed and the front clip back on. By then, Tommy
will have the rest of the panel work done and I can start
block sanding. I saw that Eastwood
had tools and materials for polishing my old stainless
& chrome. Because I'm too cheap to buy new stuff and
not afraid to get dirty, I think I try some of this stuff
and let you know how it worked in part 4.
[ Part I
] [ Part II ]
|