|
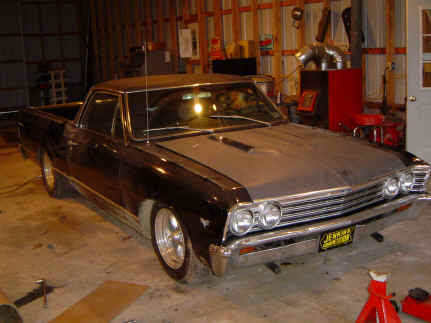
Work has started on the CJY 67
Elcamino. The first part of the project was to lower the
Elcamino. We needed to accomplish this before the body and
paintwork was done. It was decided to use lowering springs
in the rear & then cut springs in the front to achieve
the desired ride height. We had to buy lowering springs
for the rear because 67 to 72 A body rear springs have a
tighter wrap at the top & bottom coil of the spring.
That means we could not cut them.
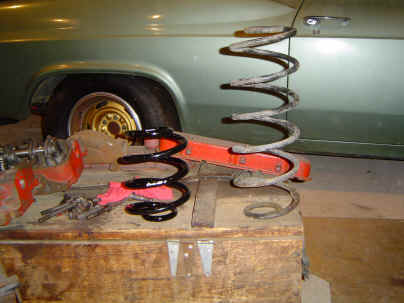
For our rear springs, we went online
with CLASSIC PERFORMANCE PRODUCTS INC. www.classicperform.com
They offered 2 choices in drop springs. 2 inches of drop
or 3 inches of drop. We opted for the 3” drop. The
springs arrived from California in five days with a cost
of a mere $125 including shipping. We were very happy with
the service & the springs.
Installing them was easy. We just
took the floor jack, jacked up the rear under the rear
housing, placed jack stands under the frame in front of
the rear wheels, removed the rear wheels and then unbolted
the shock bottoms. Letting the floor jack down allowed the
rear suspension to hang. At this point, you should be able
to simply reach in and pull the stock springs out. In our
case, we had to use a spring compressor. Apparently the
previous owner installed “dump truck” springs or
something. Look at the difference in height from our new
Classic Performance springs and the Baja springs we took
out.
Once the old springs were out, we
simply sat the new springs in their place and jacked the
rear back into place. When we went to reattach the lower
shock bolts, we discovered the old Delco air shocks would
not compress enough to bolt back into place, let alone
allow any suspension travel. This meant we were going to
need new shocks.
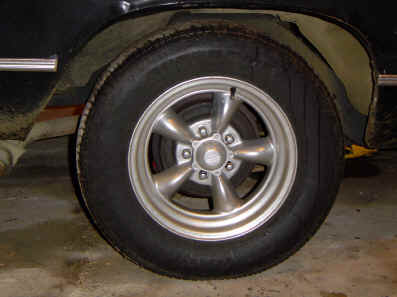
Now it was time to take the Elcamino
off the jack stands and set it on four wheels again. Wow,
what a difference.
We were looking for a little rake in
the look of the Elcamino. Before we took the front end
apart, we measured the rear ride height of the car using a
straight bodyline that ran up the side of the car. From
this, We decided the front needed drop 1 to 2 inches so
the front stance would be just a little lower than the
back.
Now for the front. Once again, we
jacked the Elcamino up and set jack stands under the frame
so the suspension could hang free. We then removed the
wheels, front shocks, and sway bar bolts and bushings.
Next, we took the jack and placed it under the lower
control arm to take some pressure off of the spring. We
removed the cotter pin & nut to the lower ball joint.
Using a ball joint splitter, we knocked the ball joint out
of the spindle. Lowering the jack, it was easy to pull the
spring out.
Knowing that I didn’t want to be
the guy who cut the spring 3 times and found it was still
too short, it was decided to cut only 1 coil (2” of
uncompressed spring), a see what it looked like. Using a hand grinder, it was easy to cut. We then sat the
spring back in the lower A frame and jacked the ball joint
back into the spindle. Taking the car back off the jack
stands exposed that we had only accomplished a half-inch
of drop. While pushing up and down on the car to re-seat
the spring in it’s perch, we discovered a terrible
“geeking” sound and found the fresh cut on the spring,
grinding into the perch on the lower A frame. For our next
cut, I took a half a coil out (1” of uncompressed
spring) and ground a bevel on the bottom of my cut to
eliminate the “geek”. This only dropped the car a
quarter inch. Felling confident I knew what I was doing
now, We took it apart again an cut another full coil out
of the spring. This time, we got the car where we wanted
it. In total, we cut 2 ˝ coils, 5” of uncompressed
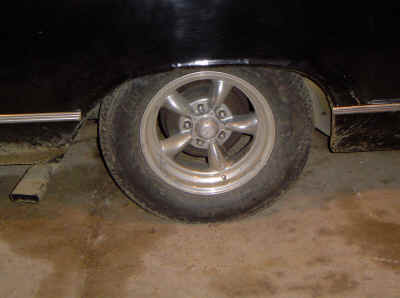
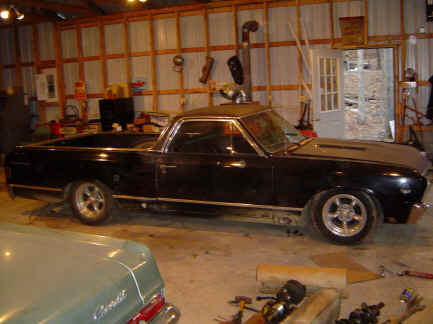
spring to drop the car 1 ˝”. After cutting the other
side the same amount, we lowered the car to the ground and
here were our pleasing results.
As mentioned earlier, because we had
lowered the ride height, we needed shorter shocks.
Measuring from top of the shock mount to the bottom of the
shock mount on all four corners established the ride
height for our new shocks. I was able to go down to my
local auto parts store, tell them my vehicle and my ride
height and they were able pick front and rear shocks what
would work for the Elcamino. After the shocks were on, we
only had a minor tire clearance problem with some old
bodywork on the left rear. A hammer fixed that. We’re
putting new panels on the old Elky anyway.
Amazingly, after all of this, the
front wheel camber was still in tact so it was time for a
road trip. The exhaust drug a little going out the
driveway. Loosening an exhaust clamp and spinning it
around later fixed this. Out on the road, The Elcamino
handled just like it always did. The ride was smoother
than before but the suspension did feel a little
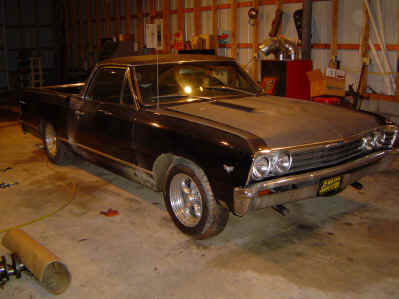
“shorter”. I was pleased with the ride and while
cruising in town, the heads really spinning. The new
lowered stance really works well with the classic lines of
a 67 Elcamino.
Now that the suspension work was
done, it was time to order some body parts. Taking a wire
wheel on the hand grinder exposed bondo in the bottom of
the right front fender, both quarter panels, the tailgate,
and the driver side door. Amazingly, the left front fender
was rust free. Whodaguessd.
After discussing the project with CJY
staff member and the body man on this project, Tommy Zerbe,
It was decided to get two qt panel skins, a tailgate skin,
a door skin, and a lower patch panel for the right front
fender. While we were at it, I decided to order new
reproduction wheel opening moldings, and Super Sport hood
louvers.
To fill our needs, I went straight to
www.restoreclassics.com
I ordered all of my parts quickly & easily. The next
day, I received a phone call from restorclassics.com
stating there was currently a shortage of Elcamino rear
quarter panels. I like the fact that they didn’t beat
around the bush and told me immediately of the shortage. I
decided to try else ware for the quarter panels. I ordered
them from Classic Industries. Turns out
restoreclassics.com was right. Classic Industries is out
of them also. The parts I ordered from restoreclassics.com
arrived at my doorstep in 3 days. That’s fast!!!.
Everything looked great and all the parts were super
protected for the shipment. I was pleased.
Mean while, Tommy got started on our
custom hood. The idea was to blend a 69 Camaro cowl
induction hood with a 67 Chevelle Super Sport hood. A
good, straight 67 Malibu hood (flat hood) was purchased
for a mere $50. A rusted, dented, unusable Camaro cowl
hood was donated by a friend. Tommy cut the cowl out of
the Camaro hood and cut the center out of the flat
Chevelle hood. Using
a panel flanger and the mig, Tommy merged
the two hoods together. Then he added a twist. He
notched out the top, sides of the cowl scoop to inlay 67
Chevelle Super Sport louvers. Check it out.
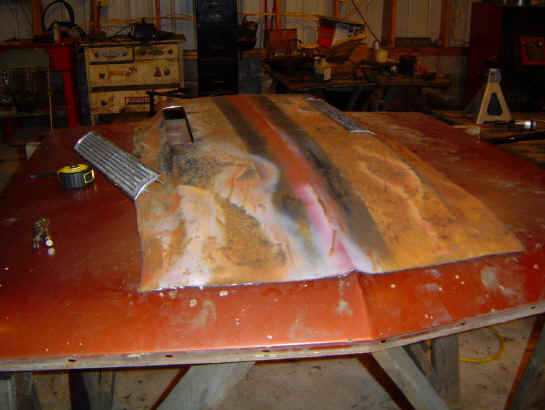
Petty cool… huh? Next month, I
cover fitting the new panels and a cool panel tool, which
we got from www.eastwoodcompany.com
Dave
[ Part I
] [ Part III ]
|